Showing posts with label Permaculture. Show all posts

Tuesday, February 11, 2014

Preparing for Spring during the off season

Hello folks!


I haven't made any post recently because there isn't much going on in the garden at this time of year.

Some of my other interest include fly fishing and tying flies. I've stayed busy lately tying flies and getting syched out about the up coming fishing season. Anyway, I'm still getting ready for the gardening season.

I have planted seeds inside using the lighting stand that I built. The seedlings are growing well under the lights with the help of a south facing window..


All of the tomatoes came up pretty quickly, but the peppers and eggplants have been much slower to germinate. They have finally started to peek their heads out though. As you may be able to see, some of the tomatoes have started  their first set of true leaves. They will have to be transplanted to bigger pots by next week.


I will transplant them to these 18 oz. plastic cups. I have drilled a small hole in the bottom of the cups for drainage. This was easier than it sounds. With the cups stacked together I was able to drill through several cups all at once. They were very cheap at the Dollar store and I can save them to use again next year.


I also made some plant tags. I cut them from an old kitty litter bucket with tin snips. I was able to get 64 plant tags using only the flat sides of the bucket. These can be used in the pots and with a hole punched in them, they can be tied directly to the plants in the garden. I'm going to have so many varieties of tomatoes, I'll need the tags to keep everything straight.


I'm going to have a lot more plants than I can use in my garden this year, so I may try to sell some on Craigs list or give them to members of a permaculture group that I joined. Having free plants is a good way to build your friend list!

After the gardening season starts, I will have plenty to write about. So don't give up on me yet!:)


Soooo......Until next time......HAPPY GARDENING!

Friday, January 17, 2014

Lighting for seedlings

Hello folks!


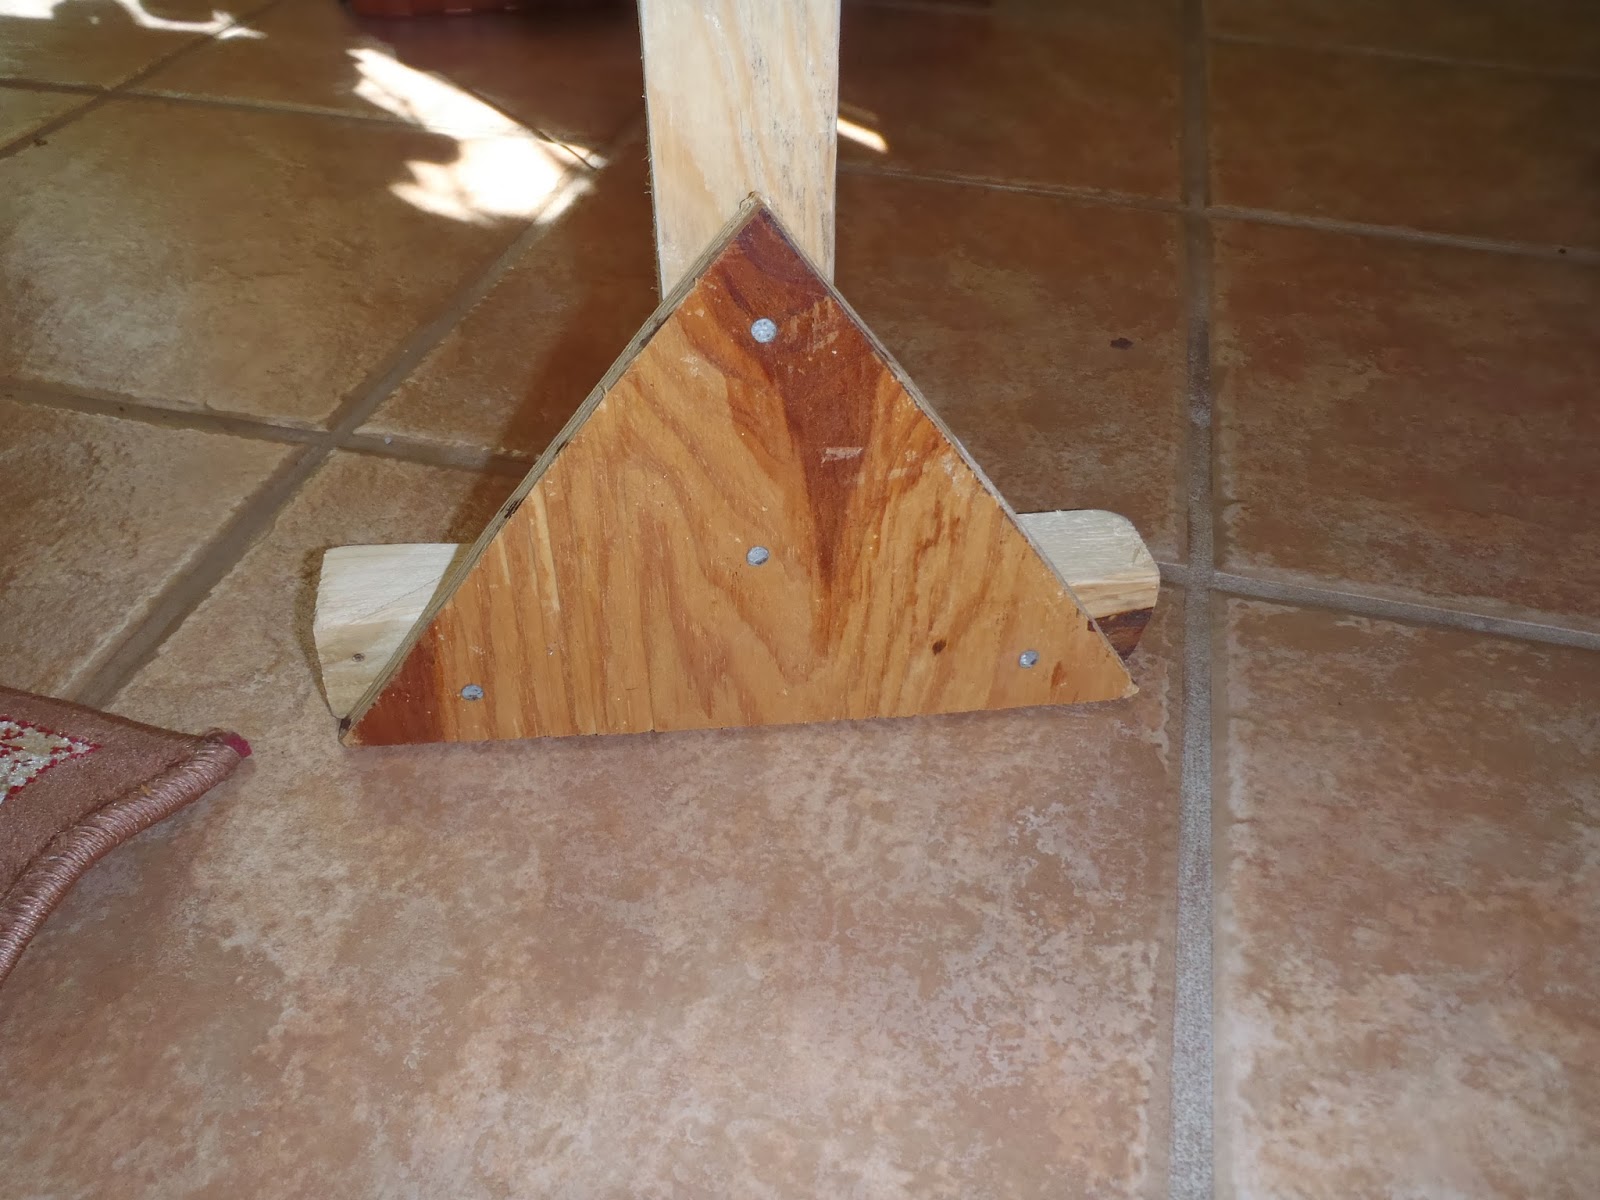
I got to thinking about starting some seeds today and thought I needed some way of hanging lights above the plants. I thought about it for a little while and came up with an idea. It was a nice day so I went outside and built this.


I ripped 2 x 4 lumber into 2 x 2 lumber to keep it light. I connected the top piece to the end supports with angle brackets so that it could be easily taken apart and bundled for storage.


I cut triangle brackets from 1/2" plywood for support at the bottom.


As you can see in the first photo, I hung 2 loops of small chain to hold the lights. These can be adjusted to keep the lights 2 - 4 inches above the plants as they grow. I used 2 aquarium light fixtures that I had for the lighting. Hopefully this will be enough light to get them started. I built the stand so that I can add more lights if needed. And I should be able to take the plants outside on nice days to give them some sun and to help harden off the plants.


During the holidays my house mate was making stuffing. She was using Chestnuts as one of the ingredients in her receipt. I started wondering if these nuts would sprout and grow. While she wasn't looking, I grabbed one. It was a very hard nut so I cut a little off the bottom thinking this would help water soak into the nut. I planted it in a pot with some organic potting soil. A couple of weeks ago I got curious and dug the nut out to take a look. It had sprouted a root! I put it back in the pot and covered it up with soil. Today I checked on it and it has sprouted above the soil and and is trying to grow leaves! .


I'll let it grow until it out grows the pot and then add it to my food forest. It will be a welcomed addition.

Starting seeds is a good way to be actively gardening during the winter months. If you are doing anything to stay active with your gardening, let me know . Maybe it will give me some ideas to work with.


Soooo......Until next time......HAPPY GARDENING!

Thursday, November 21, 2013

Hugelkultur

In a recent post I used a planting technique that is well established in permaculture circles referred to as Hugelkultur ( I also misspelled it). For anyone that may be unfamiliar with Hugelkultur, here is a video that explains a few different ways of using it.


I think this is a great planting method for sandy soil. 
 

Sunday, November 17, 2013

First tree in the food forest

Today I transplanted a small Fig tree that was in the area where my future vegetable beds will be. This is the third time I have transplanted this tree since I moved here . It is being planted in the area that will become my food forest, so this should be the last time it gets moved.

I'm going to be using hugel culture methods for my food forest. I've read that hugel culture is German for mound culture, which means growing in a mound. This would be accomplished by placing a stack of wood (tree trunks and limbs) on the surface and covering it with a mound of soil. But in Florida's sandy soil, I think a mound will dry out too fast. So I will be burying the wood, then planting on top of it, creating a bed that is only slightly raised.

I started out by digging a planting hole about 2 feet deep and 3 feet wide.


Then adding 2 layers of well aged fire wood with a rotten stump in the middle.


On top of that I added some rotted moss covered limbs that came out of my Oak trees during some recent high winds. This layer along with the rotted stump, should start soaking up water quickly, to retain water during dry spells.


 Then I topped that off with some leaves and palm fronds that came out of a load of wood chips.


Then I backfilled with soil and planted the Fig tree, creating a watering ring as I watered it in.


Inside the ring I mulched with leaves and twigs from a Wax Myrtle (Myrica cerifera), which is a nitrogen fixing, native plant that grows in this area. I think this should start decomposing by spring, releasing nitrogen into the soil to replace nitrogen that it being used up by the rotting wood. Outside the ring, I mulched with a thick layer of wood chips, creating a bed for this tree that is 6 feet in diameter.
 
 
In the spring I will plant some beneficial plants around it to create a fruit tree guild. By this time next year, we should be able to see the benefits of this permaculture method.
 
 
Sooo.... Until next time....HAPPY GARDENING!


Friday, November 15, 2013

Monday, November 4, 2013

OOOH MY ACHING BACK (Revisited)

Over the last 2 days I have been able to finish digging everything out of this bed.


I have 20 hours invested in this project. That's 20 hours of digging, squatting, kneeling, tugging, pulling, standing up, squatting some more, tugging some more, lifting.
 
 Oh, and did I mention digging?
 
       I'll say it again.......OOOOOH MY ACHING BACK!
 
 I'm glad this part of the project is over!  From here on out it will get easier. I'm going to leave this bed like it is for a while and let any weeds that want to come up, do so, then I can hoe them down. When the leaves start dropping I'll put a thick layer on for mulch and they will decompose and enrich the soil some by spring.                                                                                                                                        
 
While digging this bed, I dug up some roots from some Maple trees that I had cut down 5 years ago. Some were about 1 1/2 inches thick.  One was very soft and when I gave it a squeeze, water poured out like squeezing out a saturated sponge. I was quite surprised. Evidently, there could really be an advantage to the hugelkultur method. I will be using this technique when I plant my fruit trees.
 
This Red Bud tree was planted right in the root zone of the old Maples.
 

That is probably the reason it has grown so well. I planted it 3 years ago as a bear root sapling.... now it is 12 feet tall. When I dug the hole for this tree I had to use an axe to chop thru a 6 inch layer of tangled roots, so I know there is lots of rotting wood in the ground.

That is all for now.

Soooo..... Until next time..... HAPPY GARDENING!


Friday, November 1, 2013

Winter Garden

This morning I did some weeding and mulched my bed of greens. I planted this bed about a month late this year. I double dug the bed and pulled a couple of inches of soil from the paths to create a raised bed. I usually don't make raised bed.... I think they dry out to fast in our sandy soil. We will see. I added wood chips to the paths at the advice of a friend that is a permaculture designer. He said this will make the paths hold water and the plants in the bed will put roots over below the path to use the reserve of water. There is also a 2 foot high fence around the bed to keep my little dog out. He could probably jump over, but he hasn't figured that out yet.

  I'm sure this bed will provide greens all winter then come on strong in the spring and I'll be putting lots of greens in the freezer.

Soooo......Until next time.......HAPPY GARDENING!