Showing posts with label Organic. Show all posts

Monday, August 11, 2014

Worm Barrel

Hello folks! 

I made my first outdoor worm bin this weekend. I used leaves, composted horse manure, peat and coco coir for bedding. Then tossed in some partially decomposed banana leaves and dwarf marigold trimmings on top. It's located in a shady spot under a Crepe Myrtle in a bed on the north end of my house. I'll throw in some landscape cloth to cover it and keep out birds. I got this idea from Rob Bob's You tube channel. If you are interested in worm composting you should check him out.


So...... Until next time......HAPPY GARDENING!

Sunday, June 22, 2014

HELP! My Garden is Overgrowing Me!


Hello folks!

Last week I harvested the largest of my Yardlong Beans and had enough for a couple of meals. They were delicious cooked with onions and crumbled bacon. I decided to let them fill out a little more and pick some this weekend. I'm here to tell you.....this may have been a mistake! I've never seen anything grow so fast!
 This morning I harvested 10 pounds of beans! A lot have grown to the point that they will have to be shelled. I'm going to spend the afternoon freezing most of these, then I'll cook the rest for supper and fry some of the Hill Country Red Okra. I fried some of the Okra last week and it was sweet and tender. Even the large pods were tender! I think I over planted the beans this year. Maybe I shouldn't have planted the whole 20 foot long trellis with beans!   Live and learn!


Here is some more of my harvest from this morning.


The Matt's Wild Cherry Tomatoes are growing so wildly that the branches from separate plants are reaching out and sort of weaving together, helping to support each other.


This is a cluster of the Riesentrube Cherry Tomatoes.They are highly productive and have a delicious, sweet flavor. I will be growing both of these again next year.


This is a Tropic Tomato. They are really sweet and meaty with small seed pockets. Wonderful!
 I will grow these again, also.
 You can see the damage done by caterpillars. They are even getting into some of the tomatoes and ruining them.


 But, I have purchased some B.t. (Bacillus thuringiesis).


I learned about B.t. back in the '80s from Mother Earth News. It is derived from milk and is OMRI listed. It targets caterpillars only and is not harmful to birds, earthworms or beneficial insects. Totally organic! As I sprayed it on the plants, lots of the caterpillars just dropped off the plants. They don't like it!
 BWAHAHAHA! (That was my evil laugh).


The Black Beauty Eggplants are starting to produce fruit. 
I can't wait for some eggplant casserole!


The Nardello's Sweet Italian Peppers are producing well,also.


Here are some pollinators hard at work in the garden.


There are lots of wasp in the garden, too. I don't try to get close enough for a photo because I'm allergic.

So, this year I have probably planted too much of somethings and not enough of others, but as I stated earlier....Live and Learn!

Next year I will be wiser.

Anyone want to come and pick some beans!


So....Until next time....HAPPY GARDENING! 

Sunday, June 8, 2014

Sunday Morning In The Garden

Good morning folks!

It's such a beautiful morning and I couldn't resist getting out in the veggie garden!

Look at what I found.


Those Suyo Long Cucumbers are strange looking, aren't they? But they sure are tastey.
Even though the plants seem to be diseased, they are producing like crazy!

And the Hill Country Red Okra are huge. 
The largest one is 4" long and over 1" wide! 
I'll have some fried Okra very soon! Mmmm!

Well, I've got visitors coming today for smoked ribs, so I've got to get busy.


So....until next time....HAPPY GARDENING!

Thursday, April 17, 2014

Spring Planting Update - 2014

Hello folks!


I've been busy this past week planting my garden. I usually get out at first light and work on it for a while before I start my work day.

One morning I found this in the garden.


It appears to be a type of fungi. It reminds me of sea sponges that grew in a reef aquarium I had at one time. Just to give it some scale, its about a foot long. When I returned that afternoon it had changed to an orange color. The next day it was yellow again with a black top. Man .... talk about a soil fungal web!


This is a trellis of sorts that I built for Asparagus beans and Cucumbers.


 I just used what I had available from trimming trees back during the fall. It may not suite everyone's taste, but I like the primitive looks of it .... and it was free. It has a tripod at each end and one in the middle. Hopefully, mother nature won't blow it down.


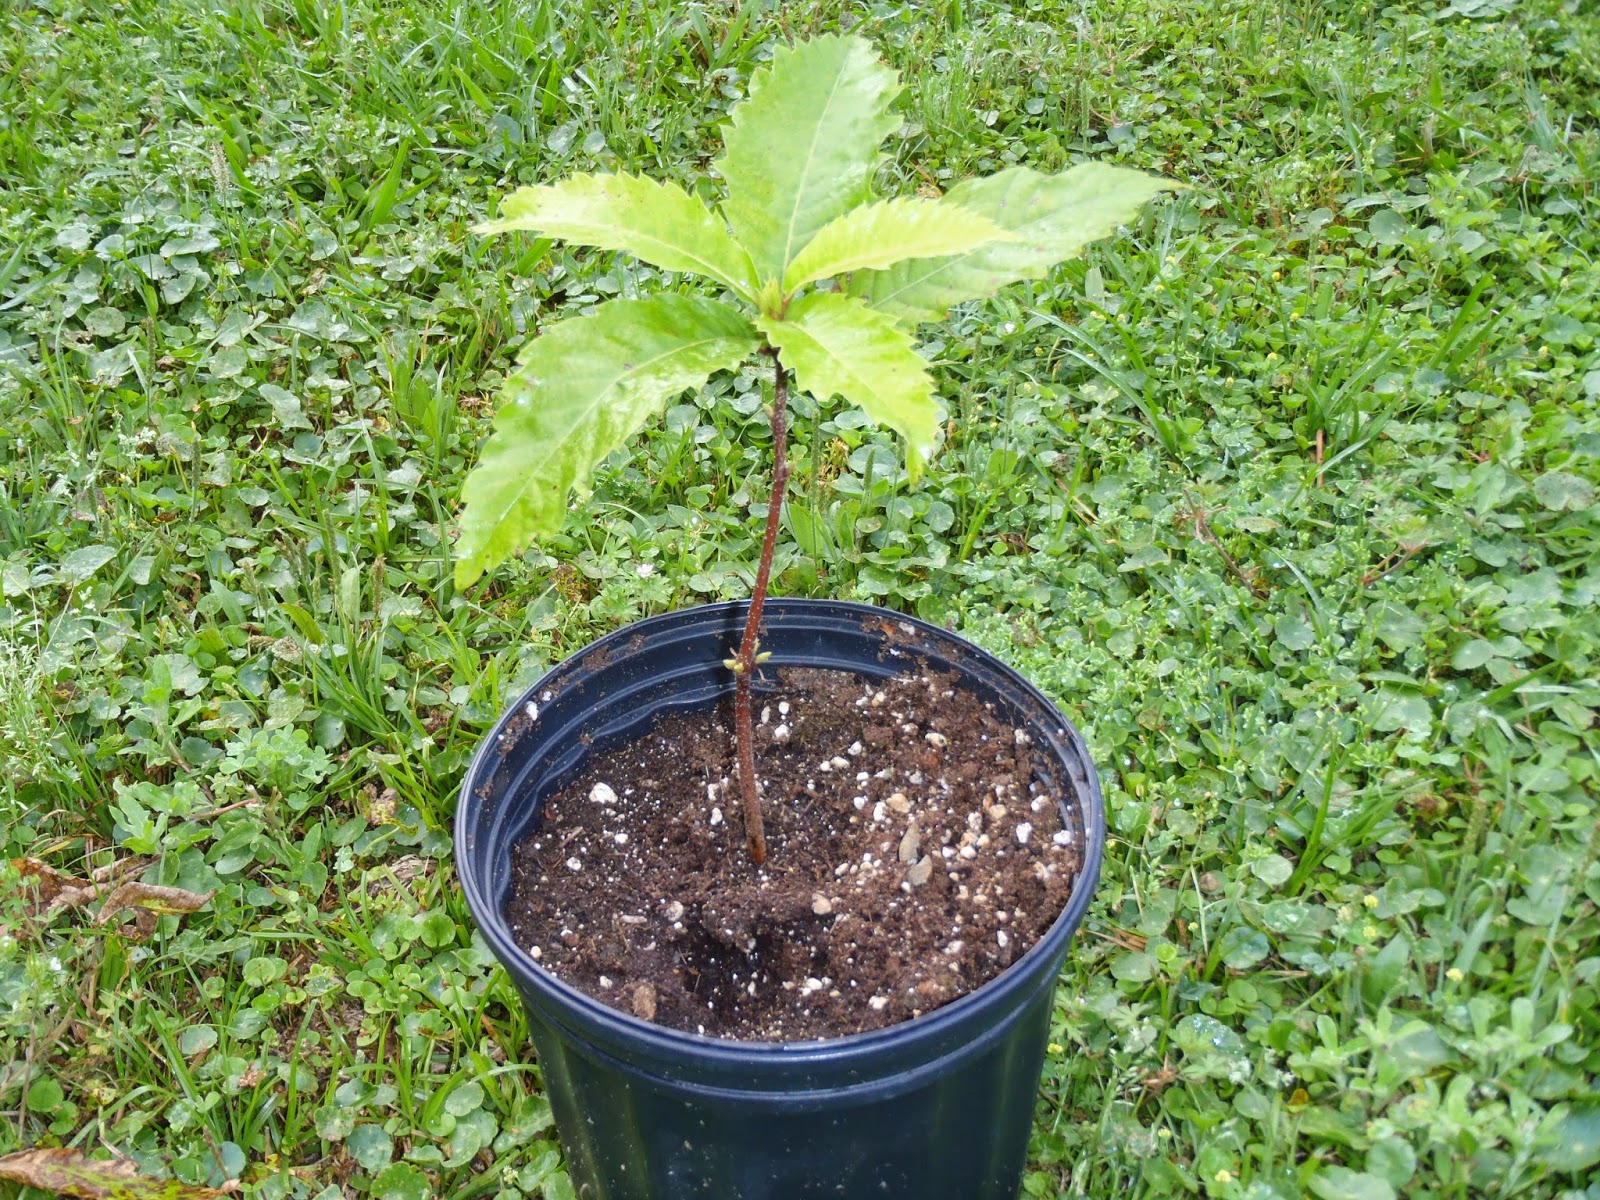
This is the Chestnut that I planted as a seed back during the holidays. It has really grown great! Its about a foot tall now. I will probably have to add it to my food forest area this fall. I wonder if it will produce nuts here in Florida.... Hummm.


Here is a shot of some Bromeliads that I have. I like growing them in pots because they don't require much water. I really like the red ones. According to the Southern Living Garden Book, they are a hybrid.


How are you doing in your garden? Leave a comment and let me know.


Soooo...... Until next time......HAPPY GARDENING!

Friday, April 11, 2014

Spring Planting - 2014

Hello folks!

I apologize for not making any post lately, I've been very busy trying to make a living and just didn't have the time or the will to do so. But we are into the growing season now and I will try to do better. I've been so busy that I'm a little late in getting my garden planted, but I have done some planting, so here we go!

                                          This is how my winter garden bed looks now.


Some of the Collards have started to bolt. The tall plants are Cilantro and Dill that are blooming. Both are good for drawing in beneficial insects and I've seen mason bees on the Cilantro. I'm letting them go to seed so I can harvest fresh seed.

 I've harvested all of the Turnips and Carrots and planted Eggplants. That's  Eggplant on the left and Dill on the right.


 One of my new beds now has 18 Tomato plants that are doing very well with our warmer weather


I really like these Spanish Brocade Marigolds... they have nice color and should dress up the garden a little.

In the bed on the south end of my home I have planted some Cassava plants. They will grow tall and shade the south wall to help keep the house cooler. I received these as cuttings back in the fall from David the Good of Florida Survival Gardening blog. He will have to teach me how to make use of the roots.


In front of the Cassava. I sewed seeds for Hill Country Heirloom Red Okra. They are just starting to sprout. I can't wait to see how they look with their red stalks and pods. Soon I will be adding Sweet Potatoes to this bed.


On the ornamental side, my Knockout Rose is blooming well. I love the old fashion type blooms.


My Redbud trees are blooming for the first time. They aren't fully loaded with blooms, but I bet they will look great next year.


Back during the holidays, while eating at my favorite seafood place, the waitress gave me a Lemon/Lime fruit. I brought it home and planted 10 seeds. I now have 7 Lemon/ Lime seedlings. At least 2 will be added to the food forest.


Finally, this has nothing to do with gardening, but on a recent fishing outing I got this shot of a Red Eared Slider. Its not easy to get close to one, they usually slide off their log into the water before you can get this close. Maybe it was because I silently move in with my kayak.


I still have more seeds to sew....there will be more to come!


Soooo......Until next time......HAPPY GARDENING!


.


Tuesday, February 11, 2014

Preparing for Spring during the off season

Hello folks!


I haven't made any post recently because there isn't much going on in the garden at this time of year.

Some of my other interest include fly fishing and tying flies. I've stayed busy lately tying flies and getting syched out about the up coming fishing season. Anyway, I'm still getting ready for the gardening season.

I have planted seeds inside using the lighting stand that I built. The seedlings are growing well under the lights with the help of a south facing window..


All of the tomatoes came up pretty quickly, but the peppers and eggplants have been much slower to germinate. They have finally started to peek their heads out though. As you may be able to see, some of the tomatoes have started  their first set of true leaves. They will have to be transplanted to bigger pots by next week.


I will transplant them to these 18 oz. plastic cups. I have drilled a small hole in the bottom of the cups for drainage. This was easier than it sounds. With the cups stacked together I was able to drill through several cups all at once. They were very cheap at the Dollar store and I can save them to use again next year.


I also made some plant tags. I cut them from an old kitty litter bucket with tin snips. I was able to get 64 plant tags using only the flat sides of the bucket. These can be used in the pots and with a hole punched in them, they can be tied directly to the plants in the garden. I'm going to have so many varieties of tomatoes, I'll need the tags to keep everything straight.


I'm going to have a lot more plants than I can use in my garden this year, so I may try to sell some on Craigs list or give them to members of a permaculture group that I joined. Having free plants is a good way to build your friend list!

After the gardening season starts, I will have plenty to write about. So don't give up on me yet!:)


Soooo......Until next time......HAPPY GARDENING!

Sunday, January 26, 2014

Preparing for Spring

Hello folks!


We are almost into February. This is the start of the gardening season in zone 9. My county extension office states that our average last frost date is February 17th. Now is the time to start tomatoes, peppers, and eggplants indoors so they will be ready to transplant into the garden in 5 - 6 weeks. I'll be planting cool season crops by the end of the month. Hardy root crops, Asian greens, collards, and Swiss chard can be direct seeded in the garden. Cabbage, broccoli, lettuce, onions, and Brussel sprouts can be transplanted to the garden after hardening off, if you have started them indoors. Also, potatoes that have been sprouted can be planted.


For landscape plants, now is the time to prune deciduous trees and plants. For small trees like crepe myrtle, redbud, and dogwood... prune to create a strong framework by taking out trunks and limbs that cross or rub each other. Cut close to the main stem to prevent new sprouts. Try to resist the temptation to just top crepe myrtle. This actually creates weak branches that can't support themselves when in full bloom. Liriope ( monkey grass) and other ornamental grasses should be cut close to the ground, while they aren't growing. This will refresh the plant and prevent having blades with cut tips, that will stay for the rest of the year. I'll be cutting down the tender plants that were killed by our freezes. It doesn't have to be done now, but I just don't like the looks of the dead ones.


Wait to prune spring bloomers like azaleas and loropetalums until after they bloom. Also, azaleas shouldn't be pruned after the 4th of July ( that's what my grandmother taught me ). This is when they start forming blooms for the next year. If you feel that you just have to prune, be selective and prune very lightly.


Be sure to rake up the last of your leaves and save them to use as mulch in your beds. In my opinion, leaves are the best mulch one can use. They decompose fairly quickly, adding a slow release of nutrients to the soil....and earthworms love them!


Soooo......Until next time......HAPPY GARDENING!

Friday, January 17, 2014

Lighting for seedlings

Hello folks!


I got to thinking about starting some seeds today and thought I needed some way of hanging lights above the plants. I thought about it for a little while and came up with an idea. It was a nice day so I went outside and built this.


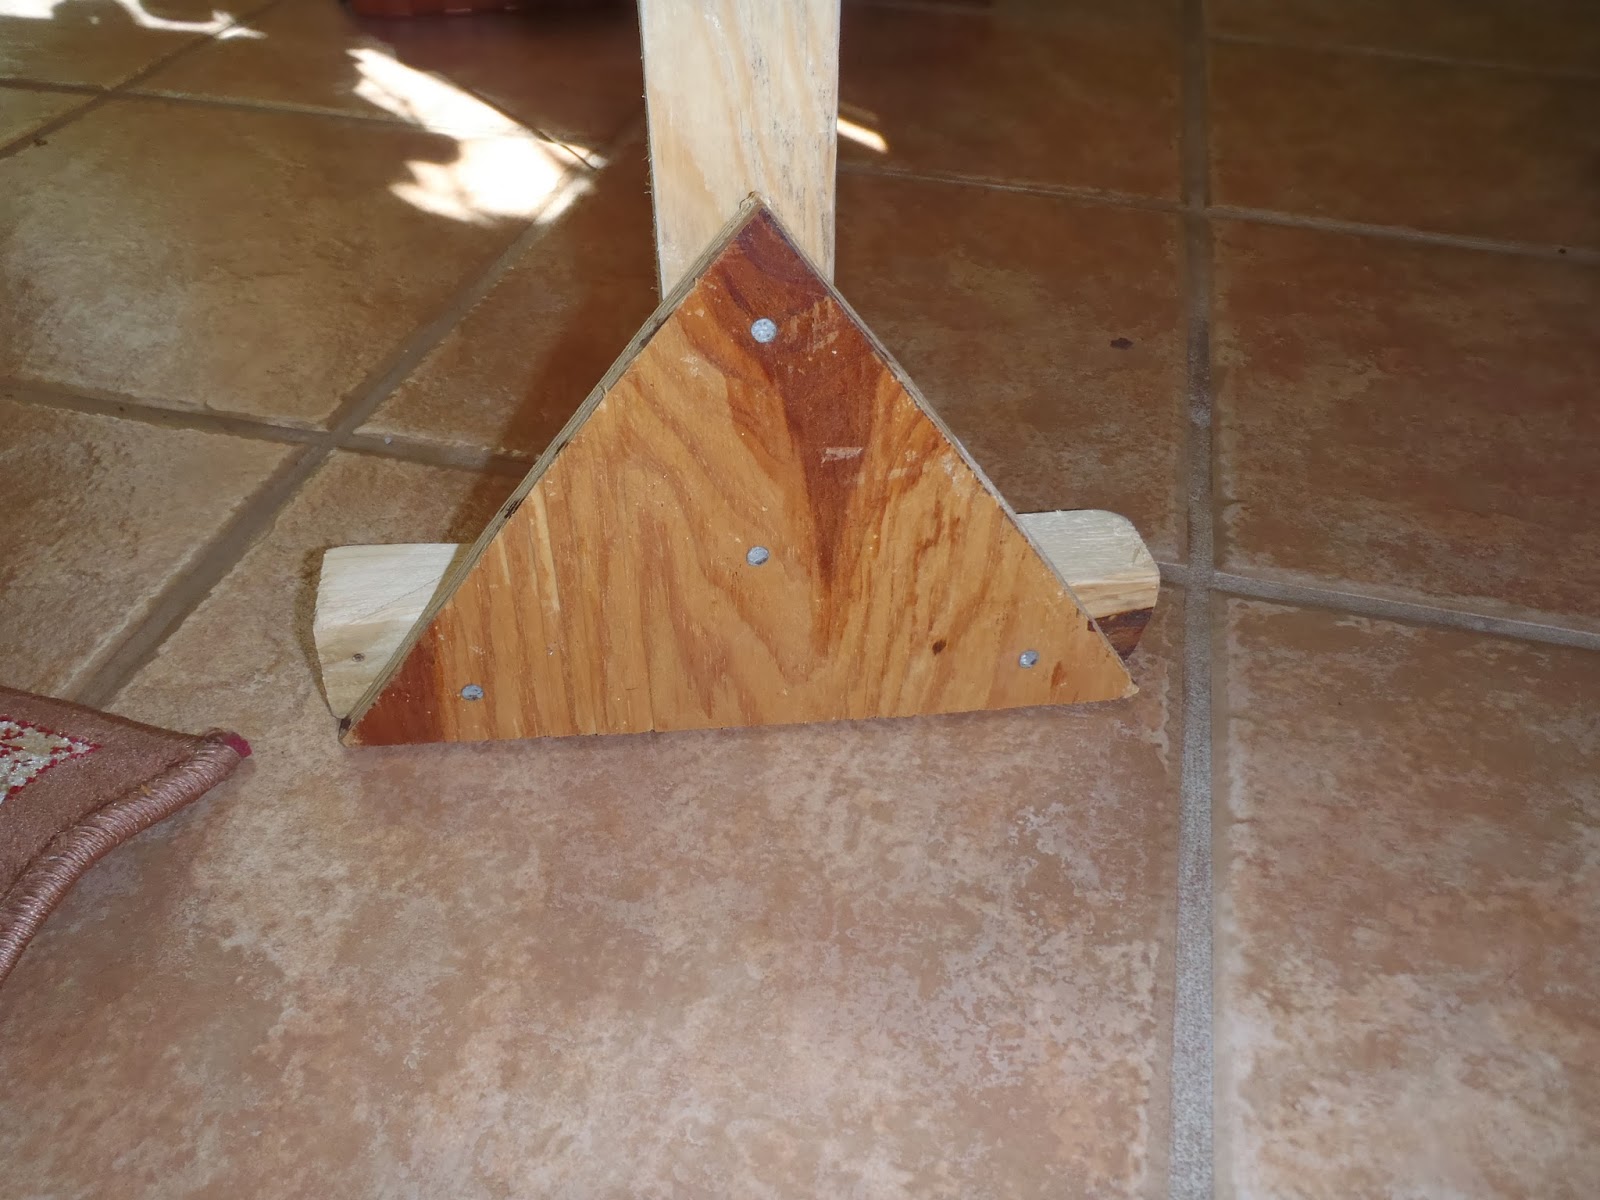
I ripped 2 x 4 lumber into 2 x 2 lumber to keep it light. I connected the top piece to the end supports with angle brackets so that it could be easily taken apart and bundled for storage.


I cut triangle brackets from 1/2" plywood for support at the bottom.


As you can see in the first photo, I hung 2 loops of small chain to hold the lights. These can be adjusted to keep the lights 2 - 4 inches above the plants as they grow. I used 2 aquarium light fixtures that I had for the lighting. Hopefully this will be enough light to get them started. I built the stand so that I can add more lights if needed. And I should be able to take the plants outside on nice days to give them some sun and to help harden off the plants.


During the holidays my house mate was making stuffing. She was using Chestnuts as one of the ingredients in her receipt. I started wondering if these nuts would sprout and grow. While she wasn't looking, I grabbed one. It was a very hard nut so I cut a little off the bottom thinking this would help water soak into the nut. I planted it in a pot with some organic potting soil. A couple of weeks ago I got curious and dug the nut out to take a look. It had sprouted a root! I put it back in the pot and covered it up with soil. Today I checked on it and it has sprouted above the soil and and is trying to grow leaves! .


I'll let it grow until it out grows the pot and then add it to my food forest. It will be a welcomed addition.

Starting seeds is a good way to be actively gardening during the winter months. If you are doing anything to stay active with your gardening, let me know . Maybe it will give me some ideas to work with.


Soooo......Until next time......HAPPY GARDENING!

Saturday, December 28, 2013

Seeds for Spring Garden

Hello folks!

Before Christmas,  I couldn't stand it any longer......I ordered seed for my 2014 garden. After extensively searching through their on-line catalog, I placed an order with Southern Exposure Seed Exchange. They specialize in heirloom and open pollinated seed, specifically for the hot, humid climate of the southeastern states.

 
Here is a list of what I ordered.
  • SPANISH BROCAD FRENCH MARIGOLDS
  • MAMMOTH SUNFLOWERS
  • GREEN POD RED SEED ASPARAGUS BEAN  (YARD LONG)
  • DAIKON RADISH (MIYASHIGE WHITE)
  • BLACK BEAUTY EGGPLANT
  • JIMMY NARDELLO'S ITALIAN SWEET PEPPER
  • ABRAHAM LINCOLN TOMATO
  • TROPIC VFN TOMATO (Developed by the University of Florida)
  • RIESENTRAUBE CHERRY TOMATO
  • MATT'S WILD CHERRY TOMATO
  • AMISH PASTE TOMATO
  • ASIAN CUCUMBER (SUYO LONG)
  • YELLOW CROOKNECK SQUASH
  • SLO-BOLT LOOSE LEAF LETTUCE
  • WILD GARDEN LETTUCE MIX
  • HILL COUNTRY HEIRLOOM RED OKRA
  • BUCKWHEAT (COVER CROP)
  • CRIMSON CLOVER (COVER CROP)
As you can probably tell, I love growing tomatoes. I haven't ever grown any of these varieties, so this will be a year of experimenting to determine which will grow best in my area. After I find varieties that grow well and taste good, I plan on trying to cross breed some tomatoes and see if I can develop a tomato of my own.
 
A lot of these seed varieties were chosen because they are suppose to be able to take the heat or have good resistance to disease.
 
I'll be starting the tomatoes, pepper and eggplant inside in a few weeks so they will be ready for planting by March.
 
I CAN'T WAIT !!!
 
Also, a big "THANK YOU" to Southern Exposure Seed Exchange for their great, fast service.
They shipped out my order on Dec. 24th and I received it on the 26th.
 
 
Soooo......Until next time......HAPPY GARDENING!


Friday, December 27, 2013

Free Manure

Hello folks!

This morning I was thinking about the fertility of my new beds and heating up my compost piles so that they would decompose faster.
I was thinking..."If I had some manure it sure would be useful." So I got on Craigslist and typed "Manure" into the search box. Up came an ad that read "Free Horse Manure." I called the number and talked to a gentleman named Mike. He said "Sure, come on out and I'll help you load it." So I did just that.

Here is what I came home with!


This is going to be very useful. It didn't have any straw or saw dust in it and he assured me that there were no herbicides in it. He used it on his own garden.
 
 
So I'm going to use my compost sieve to break it down into smaller pieces and apply a couple of inches to my new beds. It should be pretty well decomposed by spring planting time. Then I'll turn all of my compost piles and add some to get them heating up. I can also add so to my worm bin. Worms love horse poo!
 
I think this was a great find and I was invited to come get more anytime I need it! I am pretty excited about this. My house mate started laughing and said "It doesn't take much to make you happy, does it." I replied "I'm a simple man!"


Soooo......Until next time......HAPPY GARDENING!

Tuesday, December 24, 2013

Christmas Eve 2013

Christmas Eve!   

What a wonderful, happy day! I hope y'all are doing well today.

Have you got all your shopping done?

Don't forget......Lets keep Christ in Christmas! After all, He is the reason for the season!

Now on to a little gardening.....I harvested my first bunch of Turnips today. WOOHOO!

 
They have grown very well. The largest are about 3 inches in diameter. I'll be preparing these for a Christmas feast! They smelled real good as I was cleaning them to prepare for cooking. I like to cook mine with some smoked ham hocks and a little red Pepper flakes. YUM YUM!
 
I've got enough planted for a few more bunches. Hopefully, I can use them all before freezing weather hits us.  I may have to cover them to prevent freeze damage.
 
Do you have a winter garden? If so, let me know what crops you're growing. I hope you are having good success with it.
 
 
Soooo...... Until next time......HAPPY GARDENING and MERRRRRY CHRISTMAS!

Thursday, December 19, 2013

Digging New Beds 4

 Hello folks! I have finally finished my new garden beds.


This is a beautiful sight for me. It took a long time to get this done, but these will be permanent beds ...it will be worth all the work in the future. I didn't keep track of how many hours it took to complete, but I estimate around 50 hours.

As with the first bed, I still need to dig in some lime.... about 5 pounds per 100 square feet. I'm also adding about 10 pounds of coffee grounds to add some nitrogen. I'm thinking this will help speed up the decomposition of the leaves that I dug in to the bed.

The lime that I'm using is a new product from a company named Sunniland. It is a blend of calcitic lime and dolomite lime. It adds calcium and magnesium and helps raise the ph of our acidic soil. I haven't had the soil tested, but this area is known to have acidic soil. Hopefully it will help.


Soooo......Until next time......HAPPY GARDENING!

Monday, December 16, 2013

Winter Gardening

Gardening slows down at this time of year, even in north Florida. I have my winter garden, but it doesn't require much work.....just a little weeding now and then, and harvesting every few weeks.


 It has grown very well. I harvested my first bunch of Collards on Thanksgiving (should have took a photo...didn't think about at the time).


 I'll harvest my first Turnip Greens for Christmas. I'll try to remember to get a photo when I do.


At this time of year I spend a lot of time going through seed catalogs, planning my spring garden and day dreaming about spring planting. I have high hopes and a lot of excitement about how my garden will turn out. (I do this every year)  I read a lot of gardening books and magazines for new ideas and inspiration.

I'll start Tomato plants inside next month, followed by Eggplant and sweet Peppers. Everything else will be direct seeded in the garden starting in March.

Recently, from you-tube, I have got new ideas about vermicomposting and something called wicking beds. I look forward to trying a wicking bed next year. That may be how I garden once I get too old for digging the earth. You can find a ton of information about wicking beds at "Rob Bob" on you-tube.

So if you aren't busy with your gardening at this time, enjoy the rest and relaxation. It won't be long before we will all be busy...busy ...busy with gardening activity! I don't know about you, but I can't wait!


Soooo...... Until next time......HAPPY GARDENING!

Saturday, December 14, 2013

More on composting

Eliot Coleman and Barbara Damrosch have been gardening gurus for many years. I have learned from their gardening wisdom for over 30 years.

Here is a good video from them on composting and more. Although it has some age to it, true gardening wisdom never becomes out dated.


In the video it shows them layering brown and green materials. Recent research has show that mixing the materials is better for faster composting. Also, I find that some of the soil amendments like greensand may not be easy to find in some areas. They may have to be shipped which can get expensive. If you have easy access to these products that is great. But I try to use amendments that I can find locally. Actually, my gardening is slowly changing to using only free resources except for lime, which is pretty much required with our acidic soil.


Soooo......Until next time.......HAPPY GARDENING!

Monday, December 9, 2013

Digging New Beds 3

Alright..... Here we go again!

After digging the leaves into the soil, I dug one to two inches of soil from the path on the left side of the bed and added it to the bed. This was to be sure all of the leaves were covered with soil. As I dug it out I sloped the soil toward the bed, so when we get heavy rain any excess water can drain into the bed and hopefully get stored in the loose subsoil.

After grading the path, I laid down a double layer of cardboard.


I'm leaving the path on the right side of the bed bare until I complete the second bed. Then I will use soil from the path to top off the second bed.


After laying down the cardboard, I covered it with a 3 inch layer of wood chips. I'm leaving the stakes on the corners to help guide hoses when I'm watering the beds.


So this bed won't need any more work until I need to apply compost about the second week of February. Hopefully my compost will be ready by then. Its not decomposing as quickly as I would like. When I built this pile I used a lot of Palmetto fronds and they aren't decomposing as fast as some of the other materials that I've used before....like oak leaves or banana leaves. I probably won't use the Palmetto leaves again when I'm trying to make compost quickly. But I will still use them for something.... I use all the organic material from my property some where.

So, I won't bore you with more step by step on the next bed, but I will post some photos of the completed project when it is finished.

Thanks for reading my blog!


Soooo...... Until next time......HAPPY GARDENING!


Sunday, December 8, 2013

Practice What You Preach !!!

In a recent post I encouraged you to pick up bags of leaves on the side of the road. Well ...... yesterday I was leaving my neighborhood and what did I spy?  A large stack of black bags on the side of the road! I stopped and felt the bags to see if I could tell what was inside..... I had struck the MOTHER-LODE!


14 bags of leaves! I call it the Mother- Lode because I'm going to transform this find into BLACK GOLD!  The Gardener's Gold!  These came from in front of a house that had several Sycamore trees in the yard. I had to make two trips to get it all. And there were more leaves that had fell from the trees.....I'll be able to get more soon. All I have to do is wait for the owner to rake them up for me...Hehehe! Now I'm going to hit up some coffee shops for coffee grounds and build a few compost piles. I'll have plenty of compost by summer.

 I just wanted to show you that I do.... Practice What I Preach!:)


Soooo......Until next time......HAPPY GARDENING! (AND COMPOSTING)

Saturday, December 7, 2013

Digging New Beds 2

Since my last post, I have removed the sod from the area for the first bed. I drove in stakes to mark the corners of the bed and pulled string around the stakes to out line the bed.


Here I have dug the first trench in the double digging process.


 The soil was shoveled into my lawn cart until I need it to fill in the final trench at the other end of the bed. Digging for a few hours each day, it took two days to complete the digging. I was quite surprised at how tightly packed the subsoil was. It took more force than I thought it would to get the fork in to its full depth, so that I could fluff that layer. After digging I used a hard tine rake to smooth it off.


This bed is 4 feet wide and 25 feet long for a total of 100 square feet of growing space.

 You might be able to see here that it created a raised bed about 4 inches high.


After smoothing the bed I topped it off with a layer of partially decomposed leaves and twigs, that I had from my last wood chip delivery. It does have some small wood chips mixed in, but it is the only organic matter that I have. With our warmer weather, the leaves have stopped falling so I'm just using what I have available.


I dug this into the soil in the hopes that it will decompose by March, when I will be planting my spring garden. I finished all of this up yesterday at about 4:30. At this point I was pretty much exhausted, so I will continue this in my next post. Then I will show how I do the paths around the bed.


Soooo......Until next time......HAPPY GARDENING!